Tuesday, October 24, 2017

How To Inspire Our Clients with Mood Boards and Computer-Generated Decor ideas.

Well, it's that time already, and I am sure that many of you have bookings for Christmas and New Year's Eve parties. Earlier this week I spent the day preparing mood boards and design ideas for a potential client and thought that I would share how I go about the process.


Mood Boards

Mood boards (sometimes called "inspiration boards") are used by a number of creative businesses, such as interior designers, where fabric swatches and paint colour samples are grouped together to show a homeowner what type of atmosphere the new decor will create. I find that I can use mood boards to collect a range of ideas that can offer both me and my clients inspiration.

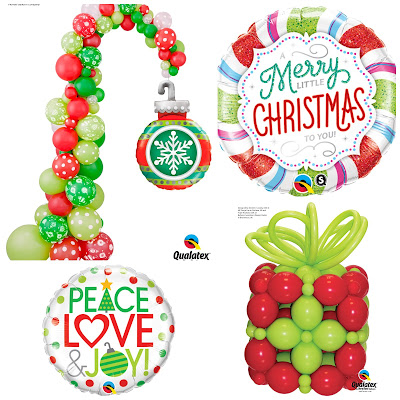
When a client asks you to propose ideas for their party, we need to establish what style of decor they are looking for. Christmas, for example, can be traditional, contemporary, or have a wintery look. We should never assume the style of decor our clients are looking for, and therefore, we can use mood boards to help to establish this. Here are three Christmas mood boards that I have created using images that I have downloaded from Qualatex.com and then used PicMonkey Collage to create the boards.


It is so easy to download all the different balloon images from the Qualatex website, and they are in a png format, which means that they have a transparent background making it easy for you to drop it into a document or a design! 

PicMonkey makes creative tools for photo editing and graphic design. However, recently they started to charge a small monthly fee. An alternative that I have found that is free is iPiccy.com


Traditional Christmas Board


Contemporary Christmas Board


Wintery Christmas Board


Each one of these Christmas boards offers a different "look," and although these do not show the full product range available within each theme, it will certainly give a client the opportunity to select the style that most suits their needs.


Sometimes we want to show clients other ideas, maybe a trend, accessory, or a design idea of decor that you have never made. Pinterest is a great resource.  our customers use it all the time! Create a Secret Board, add any pins that you want to show your customer, then click on the "+" button that appears in the top right centre. This will allow you to invite people to join your board! Only you and those you have invited can see your board. You can also invite your client to pin ideas that they have seen, giving you both an opportunity to share ideas.


The Design Process

Once we have an idea of the style of decor and the balloons that a client likes, we now have to put our creative skills to work! It might be that you only promote or sell designs that you have readily available to show a customer, and once again, that is where the Qualatex website can really help you! Simply visit the Inspiration page where you can explore Balloon Bouquets and Balloon Decor ideas, and don't forget to use the drop-down menus to refine your search. Once you have found a range of designs that you feel will work for your client, download these and drop the design images into your quote to add visual value - a page of words and numbers is very uninspiring whereas a picture is worth a thousand words and we want to sell the magic of the decor. Using visuals will help to create that magic! 

For me, I like to create my own designs. Rather than pre-make everything with balloons (very timely and expensive) to show my clients, I mock-up my design ideas on my laptop! 

Here is a design that I created.  I have used the wintery theme for this example. I wanted to feature the Qualatex "Snowflakes & Sparkles-A-Round" 3' and 11" balloons and the new 24" "Frosty Snowflakes" Deco Bubbles to create this elegant entrance decor.


I know many of you will say that you do not have the skills to create images like these, but I can assure you that it really is not difficult.

I work on a MacBook in PAGES, which is, I believe, much the same as WORD on a PC. I simply use "Shape" to import the shape that I require for my design, in this instance, a sphere. From there I "build" my decor. You will need to learn how to arrange your shapes - that will allow you to group a number of the shapes together, or send a shape to the back or move forward.

Here is a screenshot of one of the Columns that I made. The pink sphere is the shape that I dropped into my document. I can then alter the shape or colour to suit my design. I then build the style of Column that I want to show to my customer. The 3' Snowflake & Sparkle-A-Round was imported from Qualatex.com


Here is an example of the same style of Column that I designed for a recent Black & White party. This shows the computer image next to the finished result. I think you would agree that this is the perfect way to show customers what you are planning to make for them.


It might seem like a lot of work, but to be honest, I find it so much quicker to do this rather than spend a number of hours face to face with a client trying to work out what they want, and in most cases, they have no idea and are looking to you for inspiration! 


I would love to see how you inspire your customers. Please let me know, and we can feature some of your ideas along with this post! 

Happy Ballooning!


Sue
www.suebowler.com


Tuesday, October 17, 2017

Fabulous Balloon Tassels by Kerry Ferguson, CBA, and awesome Confetti Balloons by David Taylor, CBA.

It always amazes me when someone comes up with a fantastic new idea or technique with products that we use every day. 

Kerry Ferguson, CBA, of Pioneer Europe Ltd. recently demonstrated how to make fabulous balloon tassels - one of this year's top trends - using Poly Ribbon during the recent Autumn Fair at the N.E.C. Birmingham, U.K. And David Taylor, CBA, of Mad balloons in Sydney, Australia, recently shared his wonderful technique on how to create confetti-filled balloons. They both have kindly offered to share their videos with The Very Best Balloon Blog! 


For the past few years, we have been seeing the growing trend of big balloons with festoons of tassels flowing from them. You only have to search "Balloons with Tassels" on Pinterest and Instagram to see some truly amazing photographs! 

Kerry shows us how to create fabulous tassels using a product that we work with every day - Poly Ribbon. We use Poly Ribbon to make bows, but did we ever consider that it would be perfect for making tassels, too! 

Balloon Tassels by Kerry Ferguson


Kerry's Top Tips:

  • Use 2" or #40 Poly Ribbon
  • Use one full pump of HI-FLOAT per 3' balloon
  • Inflate 3' balloon to 14" (approximately 35cms) with air before inflating with helium to give a helium-air mix. This will help to reduce helium cost without affecting the floating time of the 3' balloon.


We all love confetti-filled balloons, and so do our customers! Chris Adamo, CBA, showed us in an early blog Tricks of The Trade Part 1 how to make a confetti applicator - a fabulous tool to help us to fill our balloons with confetti. "Mad" Dave Taylor now shows us his wonderful technique to make confetti-filled balloons, and it's very different from previous techniques that I have seen. He also shows us how to save a little helium and gives some great safety tips, too!


Confetti Balloons by Dave Taylor


Dave's top tips:
  • Use 25 grams of confetti per 3' balloon.
  • Use one full pump of HI-FLOAT per 3' balloon
  • Dave uses the Conwin Stretching Tool to open up his balloons
  • Inflate the confetti balloon to 45cms (approximately 17") with air.
  • The overall size when inflated with helium, is 70cms (approximately 27.5")
  • 16" confetti-filled balloons he had named Confetti Puff Balls
  • Use half a pump of HI-FLOAT per 16" balloon
  • Use 10 grams of confetti per 16" balloon.
The great thing about this industry is that we love to share, and both Kerry and Dave have shared two amazing videos that will help us all in our businesses! A huge thank you to both Kerry and Dave!

Happy Ballooning!


Sue

Friday, October 6, 2017

Trick or Treat - Inspiration for Halloween 2017!

Halloween offers the perfect opportunity to conjure up decor made from the newest range of Halloween balloons from Qualatex®. Designed by Shoko Ushizaki of Balloon Sketch Limited Company in Morioka, Japan, these bewitching delivery and decor ideas are sure to scare up some profits and leave customers spellbound!


Silly Spooky Tree


This asymmetrical, orange trunk and organically-sized foliage in Shoko's tree are sure to turn heads at any Halloween party! The colours in this versatile design can be tweaked to create a multitude of different effects to fit your customers' needs.


Bone Shakin' Centrepiece


Throw your business a bone or two with this skeleton-themed delivery! Shake up any party with this design featuring the "Halloween Skeleton Mirror" Microfoil® and "Dancing Skeletons" on Orange, Lime Green, and Purple Violet latex balloons. The twisted White 260Q bones along with the Deco Bubble base will have party goers praising this piece as they shake, rattle and roll on Halloween.

Eight-Legged Delight


Create this creepy-but-cute delivery for Halloween featuring a few adorable little spiders. This designs pairs Orange, Lime Green, and Purple Violet latex balloons with a "Spiders Web" Bubble Balloon® as its base. It's an entertaining piece that's sure to entangle lots of customers into your business web!

Tricky Treats


Make this monster mash delivery drum up cash for your business. The "Halloween Message & Icons" Bubble for the base, helium-inflate "Halloween Line-Up" Microfoils, and Orange and Lime Green "Halloween Fun!" latex balloons make this a treat for customers. Plus, you can sweeten the deal even more by adding a couple of candies made with 260Q balloons.

Fire Burn and Cauldron Bubble


Double, double, Halloween decor will be no trouble! The new "Oopsie Witche's Brew!" Microfoil is a cauldron-full of fun and the Red Orange Rainbow SuperAgate®  adds a fiery ambience. Your customers will love the spooky simplicity of this creepy column!

Macabre Monster Party


Make any party a Halloween party with this frightfully simple design, featuring the cute new "Halloween Line-Up" Microfoil. It requires minimal effort for maximum impact! Created using helium-filled 646Q weighted with a rubber ball, the coordinating monster, ghost, and jack-o-lantern figures move, sway, even travel around the room as guests walk by them, creating an eerie effect your customers will love!


To check out the full range of Halloween, Christmas, and New Year Collections click HERE. Please note that not all balloons are available in all territories. Check with your local Qualatex distributor.

For quick reference, here are the balloons and codes for the designs featured above.


This article was first featured in Balloon IMAGES Magazine April/May/June 2017. 

Happy Ballooning!


Sue


Friday, September 29, 2017

Pineapples - A Delicious Fruit or a Top Trend?

No longer are pineapples just a delicious fruit, but also one of today's top trends! Check out Instagram; there are almost five million posts with the #pineapple!


44" Golden Pineapple


Historically, the pineapple started out as a status symbol, as it was one of the fruits Christopher Columbus and other European explorers were bringing back from the Americas. In the late-seventeenth century, having a pineapple in your home was a big deal!


The pineapple became part of a tropical trend, which is believed to be influenced by the 2016 Brazil Olympics and the growing interest in South America. Pineapples and the "Golden Pineapple" are regularly used in fashion, home decor, and of course, party!


Elegant or fun, this trend can work both ways!

"Birthday Luau"
44" "Golden Pineapple" - #57362 (package) #57359 (flat)
18" "Birthday Hibiscus Stripes" - #57280 (package) #57278 (flat)
11" "Birthday Shining Star" -
Assorted Pink & Wild Berry
#25588 (25 ct.)
#37500 (50 ct.)
"Cool as a... pineapple?"
18" "Mr Cool Pineapple" - #57271 (package) #57269 (flat)
11" "Smile Face" - #85986 (50 ct.) #39803 (25 ct.)


Luc Bertrand, CBA, of wAw Balloons in Vichte, Belgium, shares one of his newest designs, showing how to display the fabulous new "Golden Pineapple" Microfoil® balloon on an elegant Taper balloon pedestal - without breaking the California Law!


Material List:

8 - 11" Gold #43749
4 - 5"   Gold #43560
1 - 27" Metallic Gold Taper #17133
5 - 13" Metallic Gold Tapers #17125
1 - 44" Golden Pineapple #57362 (package) #57359 (flat)


Method:
  • Create a 4-balloon base cluster using the 11" Gold sized to approximately 8".
  • Create a second 4-balloon cluster using the 11" Gold sized to approximately 6". Connect both the base and the second cluster together.  Add a weight.
  • Air-fill the 27" Metallic Gold Taper and secure to the base using a scrap of 260Q.
  • Air-fill and heat seal the 13" Metallic Gold Tapers and add these into the base.
  • Create a 4-balloon cluster using the 5" Gold and inflate to 4". Secure this cluster to the top of the Taper balloon.
  • Helium inflate the 44" "Golden Pineapple" and secure this to a small weight that can be hidden easily inside the top cluster.  (See image 1.)
  • Hide the weight inside an uninflated 5" balloon. (See image 2.)
  • Attach to the design. (See image 3 & 4.)
This is such an elegant design, perfect for party decor. Thank you Luc once again for sharing one of your designs with the Very Best Balloon Blog readers! 

I hope that you are enjoying all the fabulous new Qualatex balloons that are being released. If you are looking for more inspiration don't forget to check out the Inspiration pages on the Qualatex website. It's packed with Balloon Bouquets and Balloon Decor ideas plus Trending Inspiration

Happy Ballooning!


Sue


Monday, September 25, 2017

HI-FLOAT - the low-down on this magical sticky stuff!

It's truly amazing how the balloon industry has developed over the past thirty-five and more years! Who would have ever thought that there would be a liquid that would make our latex balloons float for up to twenty-five times longer! 


HI-FLOAT® is a product that we certainly take for granted and no professional balloon company could be without it. But I wonder how many of us know how its invention came about?


In 1982, Marjorie Burchette opened a small balloon delivery shop in Louisville, Kentucky, U.S.A. Within a short time, Marjorie became aware that her customers were disappointed that the latex balloons would only float for a day. She felt sure that her husband Don, a chemical engineer would be able to resolve this. Given this task, Don went to work on the problem working at night in his basement shop, and after about a year, he had developed HI-FLOAT. The rest, of course, is history; HI-FLOAT has become a phenomenal success and an essential tool for every balloon professional. 


HI-FLOAT has come a long way since that time. Andrea Burchette Cash, Phillip Cash, and Keith Burchette continue to run and grow the family business — Keith jokingly refers to working in a family business as the "Thanksgiving Dinner that never ends. It tends to be a struggle not to bring your work home with you. I encourage everyone that works with friends and family to do a little research on the subject to ensure that they succeed in their mission."  


Phillip and Andrea Burchette-Cash

Keith Burchette
In 1992, HI-FLOAT introduced an improved formula, SUPER HI-FLOAT, which worked twice as well. In 2002, the next generation of balloon treatment was born — ULTRA HI-FLOAT. This concentrated formula worked twice as well as SUPER HI-FLOAT, and it increased the floating life of a latex balloon by up to 25 times, on average.


So what is HI-FLOAT?

HI-FLOAT balloon treatment is a solution of a plastic material dissolved in water. It forms a coating inside latex balloons that greatly reduces the helium or air loss. 
With ULTRA HI-FLOAT, latex balloons can be prepared a day ahead of time, and balloon bouquets will float for several days.
Helium-filled latex balloons float 25 times longer on average with ULTRA HI-FLOAT, and air-filled latex balloons maintain full size for over one month with ULTRA HI-FLOAT.
HI-FLOAT is very safe. It is non-toxic, non-irritating, noncorrosive, nonflammable and biodegradable. It is similar to the glue on the back of postage stamps.


Average Floating times with and without HI-FLOAT


Float Times  Helium Only Helium and Hi-FLOAT
11” / 28 cm latex  1 Day 1-4 weeks
16” / 41 cm latex  1 ½ Days 3 - 7 weeks
36” / 90 cm latex  3 - 5 Days  6 -20 weeks

It's easy to see why a professional decorator would use HI-Float in all their helium-filled latex balloons!

But you can do so much more with Hi-Float! 


Confetti on the Inside of Clear Balloons — this is one of today's top trends, and can you believe HI-FLOAT showed us how to do this thirty years ago!


It is easy to make festive, eye-catching arrangements by putting confetti inside HI-FLOAT treated balloons. Confetti balloons can be used to create elegant decor for special events such as New Year’s Eve.
The confetti needs to be made of soft foil. Sharp edges could cause the balloon to pop. When inflating a balloon with confetti, safety glasses are recommended.

Ingredients:
• ULTRA HI-FLOAT
• 16-inch clear latex balloons
• Foil confetti
• A canning funnel

Instructions:
  • Add ULTRA HI-FLOAT to a 16-inch clear balloon using the grey pump restriction clip.
  • Rub the outside of the balloon in the usual manner to spread the coating over the inside surface.
  • Blow a puff of air into the balloon so the sides of the balloon are not touching.
  • Add about 1/3 cup of chopped foil or other soft confetti into the balloon through a funnel. You can make confetti by cutting up some old foil balloons that have popped, or you can buy it pre-chopped.
  • Inflate the balloon with helium to about the size of a grapefruit.
  • Shake the balloon vigorously to spread the confetti uniformly inside.
  • Inflate the balloon the rest of the way with helium, and tie it with ribbon.
  • This same technique can be used to put sparkling glitter inside the balloon.
Tip: The key to getting the confetti uniformly spread over the inside of the balloon without forming clumps is to avoid rubbing the balloon after the confetti is added. Instead, inflate the balloon slightly and shake it.
Note: It is always a good idea when working with confetti to wear protective eyewear.


How about making magical Spider's Web balloons for Halloween!

For a unique Halloween decoration, use HI-FLOAT and clear balloons to make balloons with spider's webs inside. 

Ingredients:
  • ULTRA HI-FLOAT
  • 11-inch clear latex balloons
  • A small rubber spider
Instructions:
  • Treat a clear balloon with HI-FLOAT. Refer to the clip guide to choose the correct restriction clip based on balloon size.
  • Rub the balloon to spread the HI-FLOAT.
  • Inflate the balloon with air to about 75% capacity.
  • Seal the balloon with a plastic disc or clip.
  • Let the HI-FLOAT in the balloon dry overnight. Place the balloon out where there is good air circulation. It must be very dry in order for the spider  web to form.
  • The next day, remove the clip and deflate the balloon.
  • Insert a small rubber spider.
  • Hold the balloon by the stem and the top as shown below, and stretch it a few times to separate the dry film from the wall of the balloon.
  • Slowly inflate the balloon with helium or air.
  • As the balloon inflates, the HI-FLOAT film will continue to separate from the wall of the balloon in several places and hang to form a spider web. If you inflate the balloon too quickly, the HI-FLOAT coating will totally come off, and the special effect will not work. If the coating does not separate from the balloon as it inflates, deflate the balloon again and stretch it a couple more times. Use caution so the coating does not totally come off inside the balloon.
  • This takes a little practice, but once you’ve mastered the technique, almost every balloon turns out beautiful.
Note: Since the HI-FLOAT coating inside the balloon is no longer intact, the balloon will not have an extended floating life. A long-lasting product can be made by inflating the balloon with air instead of helium and putting it on a cup and stick. Use the dilute-coating technique on the outside to keep it from oxidizing.


You can even use HI-FLOAT to create Confetti-Filled Deco Bubbles. Here are the instructions on how to do it!

INGREDIENTS
• ULTRA HI-FLOAT
• 20" or 24" DECO BUBBLE
• Mylar confetti
• A canning funnel

20 INCH DECO CONFETTI BALLOON
1) Add a ½ squirt of Ultra HI-FLOAT with purple clip on pump.
2) Rub the outside of the Deco Bubble to spread the coating over the inside surface.
3) Blow a puff of air into the Bubble so the sides of the balloon are not touching.
4) Add about a ¼ cup chopped Mylar confetti.
5) Inflate the Bubble with helium to about the size of a soccer ball.
6) Shake the Bubble vigorously to spread the confetti uniformly inside.
7) Inflate the Bubble the rest of the way with helium and tie.

24 INCH DECO CONFETTI BALLOON
1) Add 1 squirt of Ultra HI-FLOAT with purple clip on pump.
2) Rub the outside of the Deco Bubble to spread the coating over the inside surface.
3) Blow a puff of air into the Bubble so the sides of the balloon are not touching.
4) Add about a ½ cup chopped Mylar confetti.
5) Inflate the Bubble with helium to about the size of a soccer ball.
6) Shake the Bubble vigorously to spread the confetti uniformly inside.
7) Inflate the Bubble the rest of the way with helium and tie.


You can also do the same process when creating air-filled Deco Bubbles! These look fantastic as centrepiece toppers, and because the balloons are air-filled you can use a little more HI-FLOAT and a lot more confetti! 

Design by Sue Bowler, CBA.
Photograph by Cam Woody, CBA.

Note: When inflating a Deco Bubble with confetti, safety glasses are recommended.


As you can see, there are some great design idea tips working with HI-FLOAT. To see even more ideas, click HERE, or visit the HI-FLOAT YouTube Channel.

A huge thank you to Marjorie Burchette for having the initial thought to extend the floating time of the latex balloon, and to Don Burchette who made it happen!

Happy ballooning!

Sue
www.suebowler.com


Monday, September 18, 2017

Magical Unicorn - A hot trend and a fabulous new design idea from Luc Bertrand, CBA!

38" Magical Unicorn


If you think that the unicorn is a craze just for children, then you are mistaken. Everyone is unicorn crazy, and it's a trend that is set to stay for a few years yet!


This magical theme is the perfect for birthday parties and Luc Bertand, CBA, of wAw Balloons in Vichte, Belgium, has kindly shared one of his latest designs with the Very Best Balloon Blog!


"Playful Rainbow" Unicorn by Luc Bertrand


Material List


  • 11" Purple Violet Big Stars #38460 - assorted colours
  • 5" White #43607
  • 12" White Quick Links #64151
  • 6" Spring Lilac Quick Link #90200
  • 6" Robin's Egg Blue Quick Link #90424
  • 6" Lime Green Quick Link #90178
  • 6" Pink Quick Link #90180
  • 5" Yellow #43609
  • 260Q White #43962
  • 5" Rose #43600
  • 38" Magical Unicorn #57352


To Make Unicorn Body

  • Make a 4-balloon cluster using the 11" Purple Violet Big Stars inflated to approximately 8". Add a weight into the base.
  • Make 3 x 4-balloon clusters using 5" White inflated to 4".
  • Add one of these clusters into the base cluster.
  • Inflate 2 x 12" White Quick links to approximately 10" and tie together. Connect to the base, and add the remaining white balloons clusters at the centre and to the top.
  • To make the Unicorn tail, inflate one of each of the colours as shown in the picture and decrease the size of each balloon from the Spring Lilac (largest) to the Yellow (smallest.)
  • Inflate the 260Q White balloons to make the arms, add a double pinch twist at the knotted end of the balloon, and secure a 5" Rose inflated to approximately 4". Repeat the process for the second arm. Secure the arms together allowing a little stretch between the knots (see picture 3 above.)
The body of the Unicorn is all air-filled.

The Head
  • Inflate the Magical Unicorn head with helium, and secure to a small weight as shown in picture 1. This will ensure that the helium balloon cannot float away if disconnected from the body and therefore does not break the California Law and follows the Smart Balloon Practice.
  • Cover the weight with an un-inflated latex balloon - Picture 2.
  • Add head to the body - Picture 4.
This is a truly fabulous design and I am sure that they will be very popular with our customers! A huge thank you to Luc for sharing this beautiful design with us all.

Just in case you have not seen the full unicorn range, check out these fabulous new balloons!


18" "Have a Magical Day"
 #57262 (packaged)
 #57260 (flat)

18" "Birthday Magical Unicorn"
#57319 (packaged)
#57317 (flat)

11" "Unicorn" Diamond Clear with Gold Ink
#57435


Happy Magical Ballooning!

Sue